
Are you ready to get kids back to school?
We have a instructions and links to help you get those name labels and badges attached to school uniform for the start of term.
We also have some more tips such as washing, removing stains and repairing school uniform Read more at How to Extend the Life of School Uniforms.
The advantage of using sew on labels means they can be passed on and the name label can easily be removed for the next person. Wearing clothes for longer means we all reduce our environmental footprint ![]() for carbon and water.
for carbon and water.
Did you know it takes 20,000 litres of water needed to make one t-shirt? This is the unseen or “virtual water” we all consume every day and by wearing and repairing clothes for longer it means less water usage.
Sewing on labels
Here is our guide for hand sewing labels:
- Decide what thread to use: typically cotton or polycotton. Name tags are usually white, so you could choose white to blend in. Or a colour that fits the garment, so that stitches outside of the name tape are practically invisible. If you are confident in your sewing, you could select a contrasting thread colour to make your stitches stand out.
- Positioning the name tape: usually the neck area of shirts/blazers; the back of trousers or skirts. Pin it in place with a pin going in the direction of the label. Thread your needle with a thread about 25cm long. Tie a knot at the end of the thread.
- Decide on how to attach the name label:
- End stitching: Fold the short ends underneath to prevent fraying
- Form a loop by putting the ends together; sew the ends to each other & then sew one end of the loop to the garment.
- Stitch all along the label edges
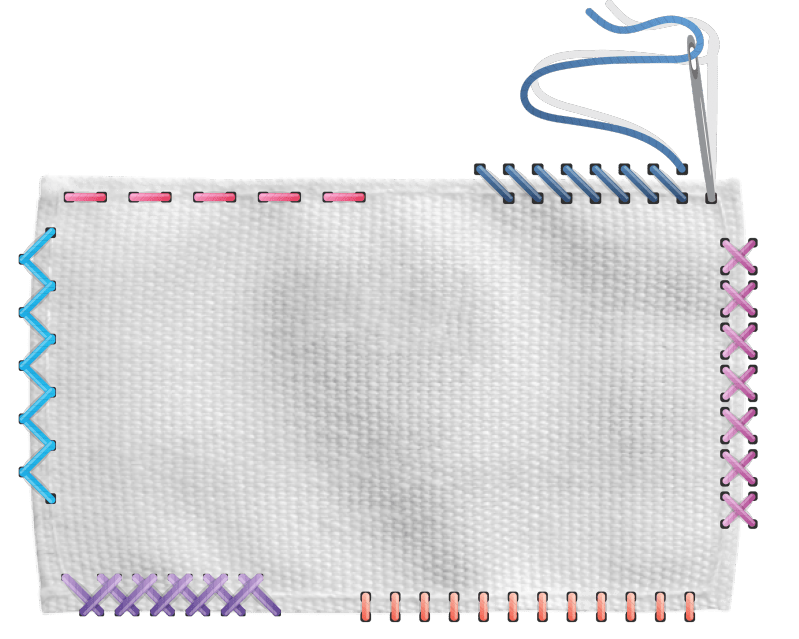
- Decide on the type of stitch (see image below and potential stitches named below):
- Running stitch: Easiest stitch with needle goes up and down through fabric in a straight line (top left).
- Whip stitch: faster than blanket stitch. This can be done diagonal or straight. Looks very nice with contrasting coloured stitches (Top right and bottom right)
- Cross stitch: Nice effect around the edge. Strong stitch and can cope with some stretch of the fabric. (Right)
- Herringbone stitch: Strong stitch that can cope with stretch fabrics. (Bottom left)
- Back stitch zig zag: usong back stitch principles you can create a zig zag pattern around the edge. (Left)
- Blanket stitch: Strong stitch that covers the label, making it hard to remove. Not great on stretch clothing as the stitch does not allow for stretching.
For more information on options for labels, this guide from My name tags gives the pros and cons of different types of labels from sew on, iron on, stick on, embroidered, printed or hand written. And if, unlike the American author, you don’t have domestic staff or a concierge to outsource the task to, there’s some useful tips on the easiest ways for you to attach them.
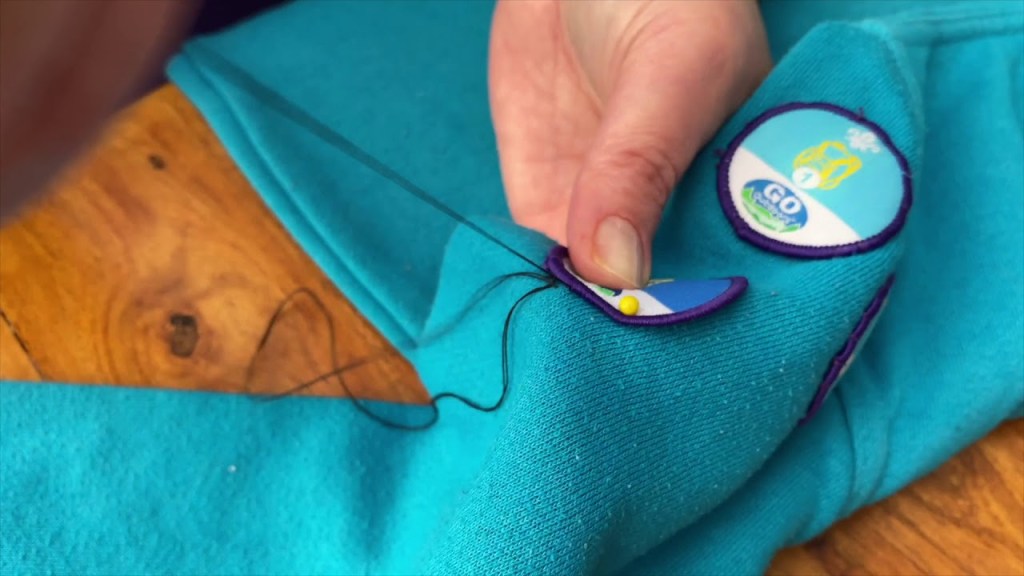
Badges for uniforms
Schools and sports teams regularly give out badges to the students and this is a great Wiki guide for adding patches to uniforms and sports kit Sew a patch on. Or you can have a look at this Scout video guide for sewing badges on.
Ealing Repair Cafe sessions
Come along to one of our sessions for a lesson with one of our volunteers on how to attach uniform badges and labels. See our what’s on page day for our next sessions. We can offer advice and lessons on attaching labels and badges. Plus all our great support and advice on mending and patching clothes and fabric.

2 thoughts on “How to sew on name labels to school uniform”